LabVIEW’s graphical programming language is used to control and program various test & measurement instruments, be it a single instrument or a system with various instruments. This series of tutorials, “How to Control Tabor AWGs with LabVIEW”, will provide step by step instructions and various examples of how to use LabVIEW in conjunction with Tabor Arbitrary Waveform Generators.
This first tutorial will explain how to get started and what needs to be installed in order to control the Tabor AWG with LabVIEW. This series of tutorials demonstrates how to program and control Tabor’s WX2184C model. For connecting with other Tabor models, such as the WW series, just follow the same instructions with the relevant changes (eg. downloading the matching IVI driver for your specific model).
This set of tutorials assumes you successfully established connection with the Tabor unit using your preferred remote interface method (LAN,GPIB or USB). Please go over our connectivity tutorials (for establishing a USB connection using one of our Wonder Wave series of AWGs, you’ll need to download & install the Tabor USB driver).
In order to control an instrument through LabVIEW, one needs to install the corresponding Tabor IVI driver of the instrument. The IVI driver provides a higher level of programming that doesn’t require any knowledge of the instrument’s SCPI commands. This tutorial will explain how to install all that is needed to control the instrument.
IMPORTANT NOTE BEFORE PROCEEDING
It is possible to control Tabor AWG without its IVI driver and only using NI-VISA . This is done using LABVIEW VISA VIs and instrument specific SCPI commands. For those interested in this method please proceed to the next tutorial “How to Control Tabor AWGs With LabVIEW – Using SCPI Commands”.
- To connect and control the Tabor AWG with LabVIEW
1. National Instruments VISA - First you will need to install NI-VISA. Please visit National instruments download page and install the latest version of NI VISA.
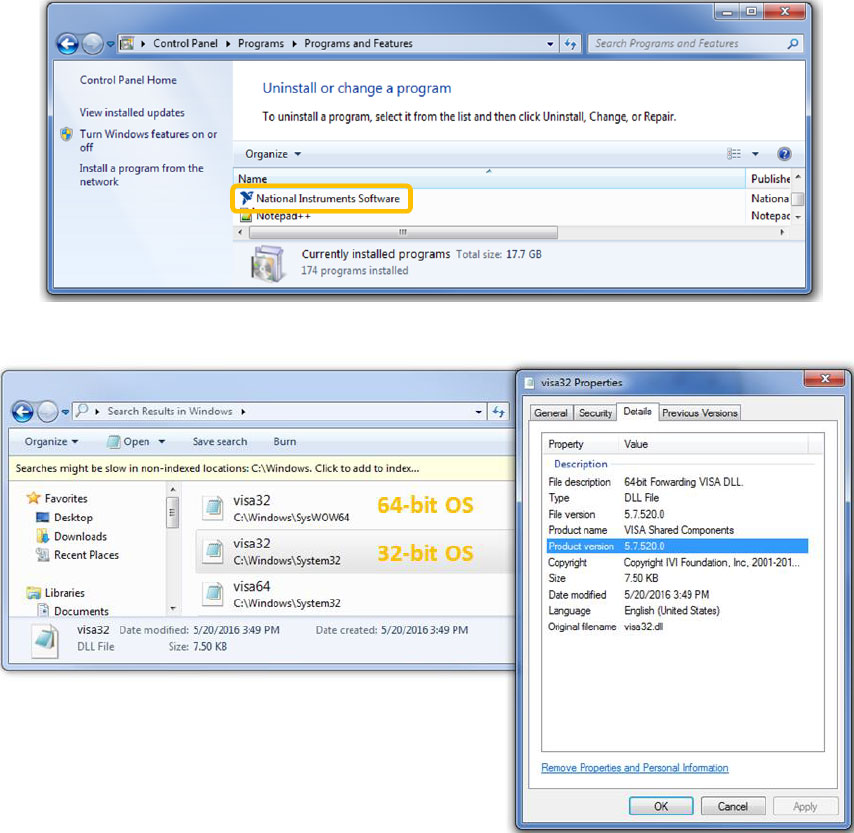
2. Please verify you installed NI-VISA and that the visa32.dll libraries are at least 4.0 or higher as follows:
3. NI-IVI Compliance Package - Next, please download and install the latest release of National
Instruments IVI Compliance Package.
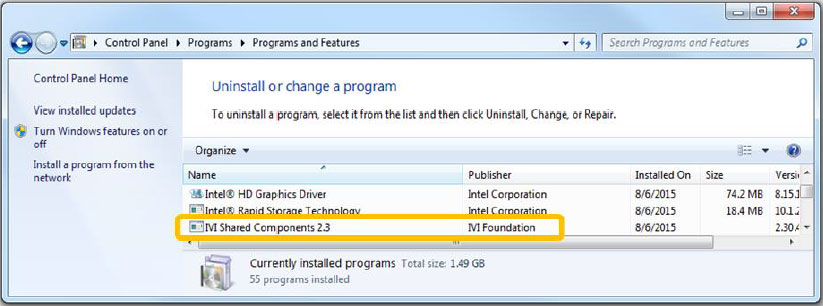
4. IVI Foundation - Next, please download and install the latest IVI Shared Components. Please
make sure to choose the right version according to your OS.

5. To verify that the IVI Shared Components were properly installed, please go to Control
Panel\Programs\Programs and Features:
6. Installation of the Tabor IVI driver –
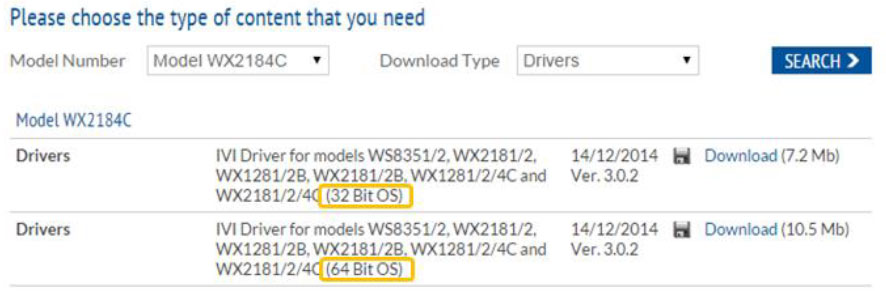
a. Please go to the downloads page on Tabor’s website. Select the model from the Model
Number’s drop-down box, and select “Drivers” from the Download Type’s drop-down
box. Click on the “Search” button. Download the IVI driver that matches the LabVIEW
version (64bit or 32bit) installed on the computer.
NOTE
In order to download the IVI driver, you must be registered to Tabor’s website using an email and a password. After you finished
your registration, click once again on the link to start the download.
b. After the download is complete execute the installation file and follow the on screen
instructions.

7. Once the installation is complete go to Control Panel\Programs\Programs and Features and
check that the IVI driver has been installed properly:

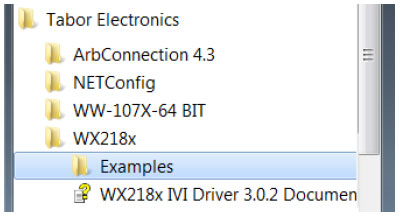
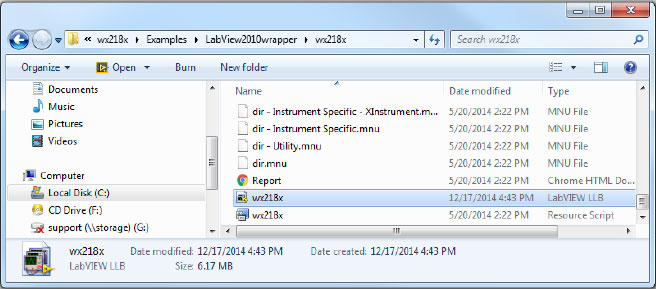
8. Next, go to START->ALL PROGRAMS->TABOR ELECTRONICS->WX218x and click on “Examples”
9. Go to LabVIEW2010wrapper->>wx218x and find the wx218x.llb LabVIEW Library file for the
WX series :
10. Copy the “wx218x” folder into the following directory of LabVIEW:
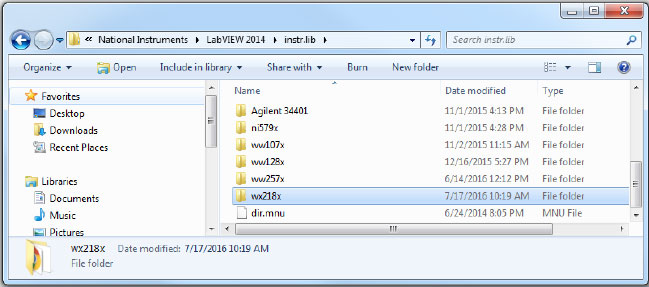
If you already have an existing folder from a previous IVI driver version, please remove it prior
to copying & pasting the new folder.
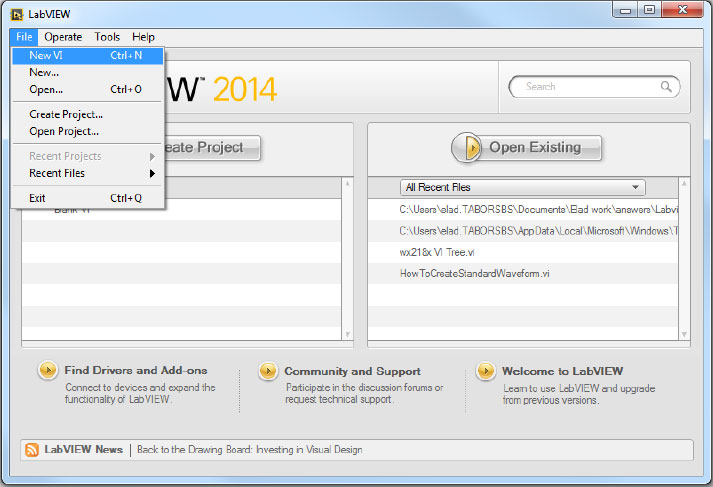
11. In LabVIEW, open a new VI:
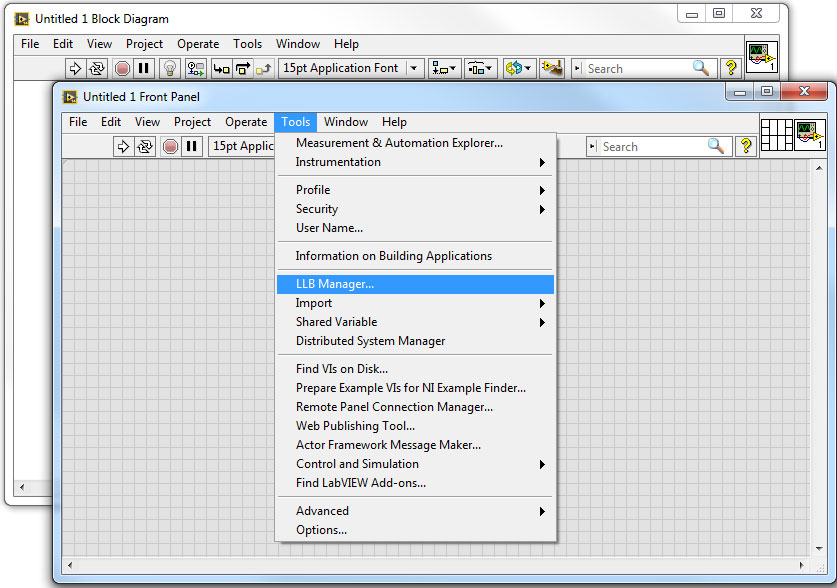
12. From the “Tools” menu select “LLB Manager…” option:
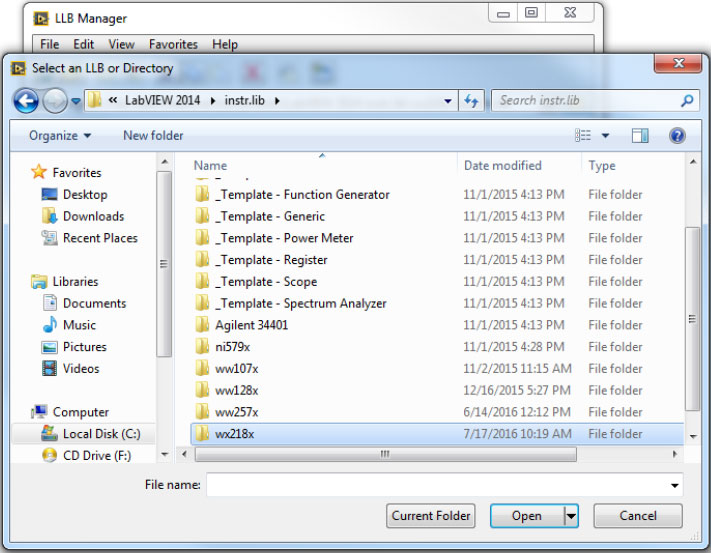
13. The “LLB Manager” window will pop up. Browse for the “instr.lib” folder of the LabVIEW
directory and you should find the “wx218x” folder:
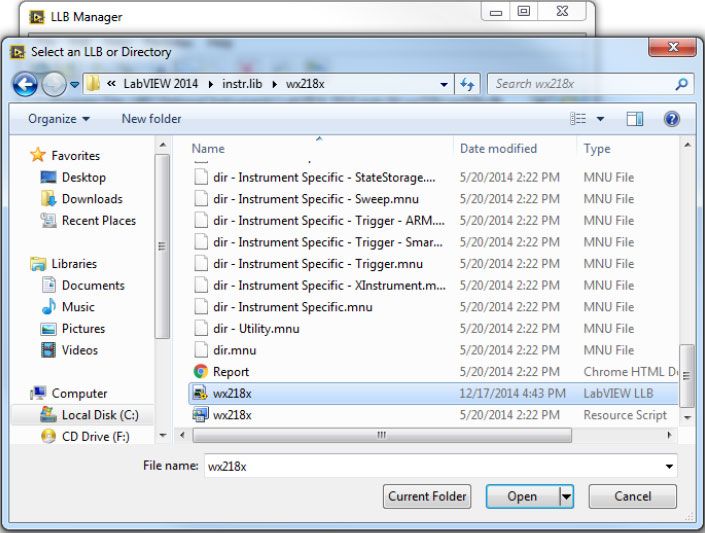
14. Double click on the following “wx218x” folder and you should see the LabVIEW Library
“wx218x.llb”:
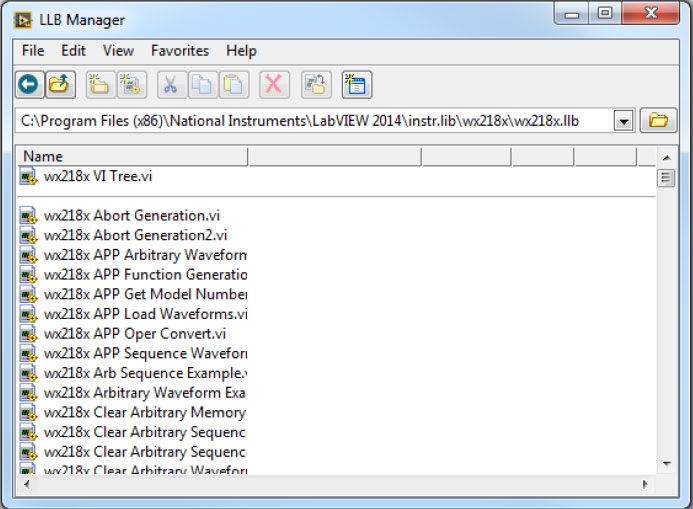
15. Double click on the “wx218x.llb” library and you should see the “wx218x VI Tree.vi”:
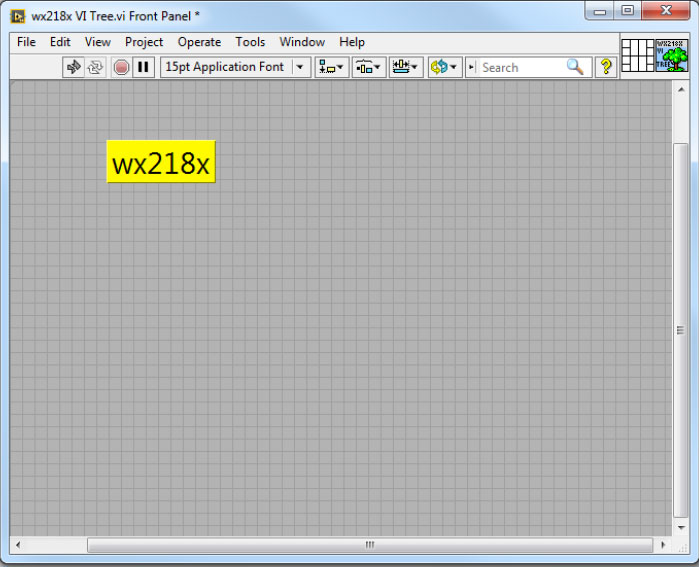
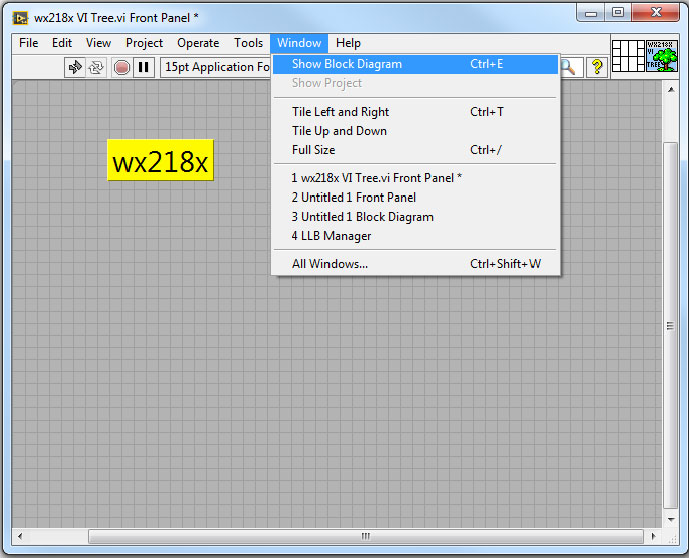
16. Double click on the “wx218x VI Tree.vi” and after loading the sub VI you should see the
“wx218x VI Tree” Front Panel as shown below:
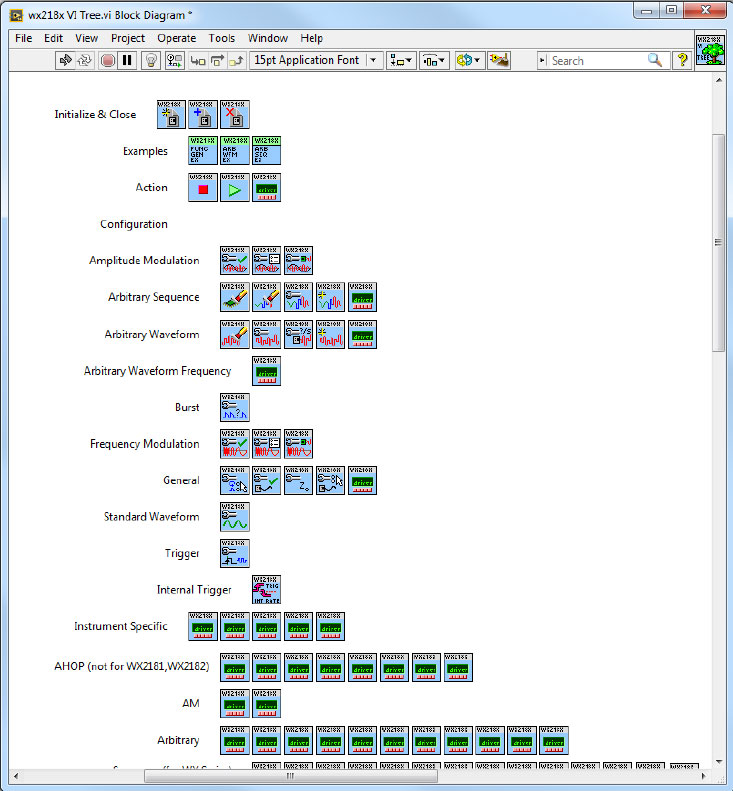
17. Open the Block Diagram of the “wx218x VI Tree” Front Panel:
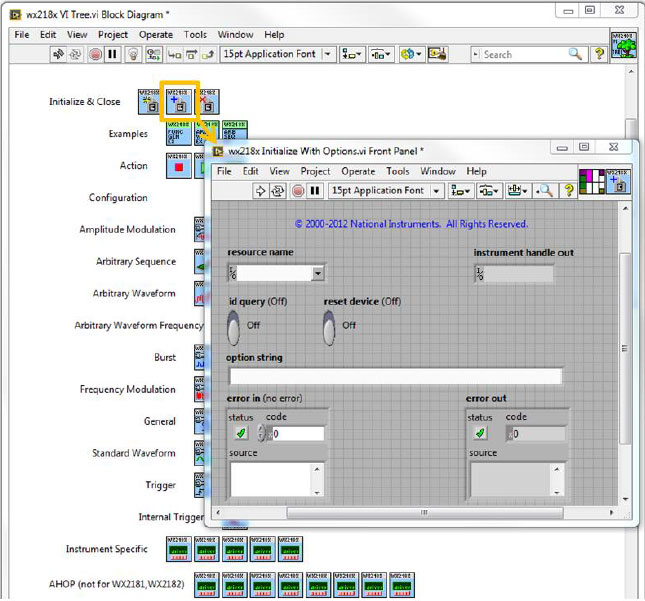
18. Double click on one of the sub VI’s and its Front Panel will pop up as shown below:
- To Test Communication with Tabor AWG using LabVIEW
For this example a WX2184C unit will be connected remotely to the computer through the USB
port:
1. Set the USB/LAN/GPIB as the remote interface, using the Tabor’s front panel buttons. To do so,
go to: “Utility”->”Remote Interface”->”Select Interface”->”Control from Interface”. Press Enter
to select the active Interface you need. Wait for the answer “Done”.

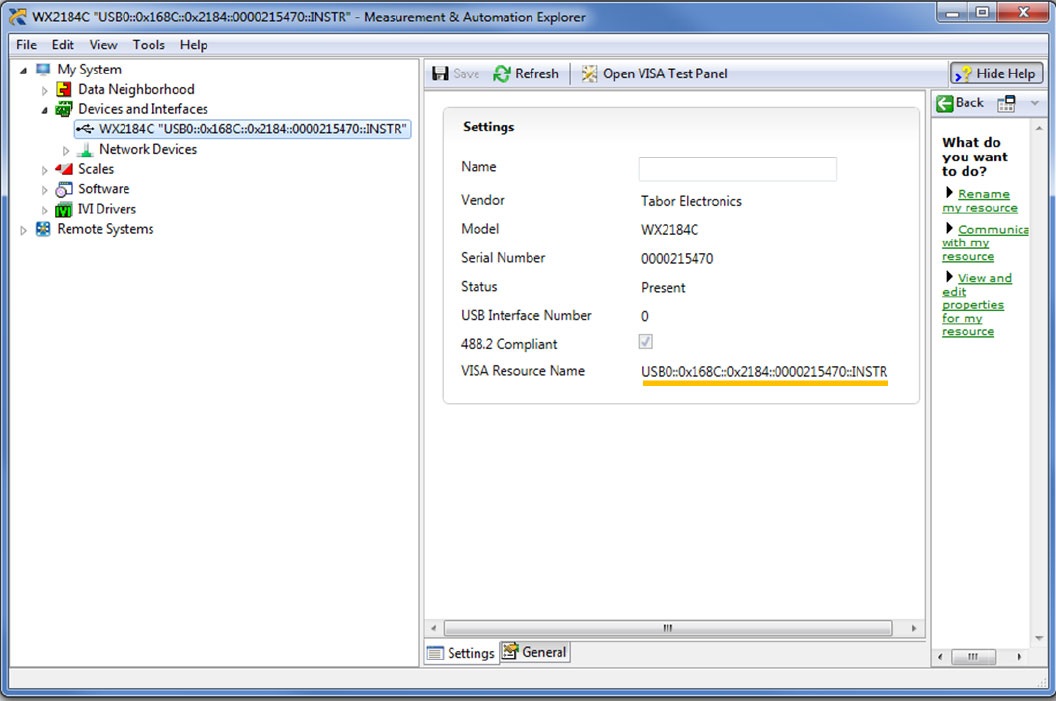
2. Use NI MAX to determine the unit’s remote control Address (Close NI MAX prior
executing the LabVIEW application):
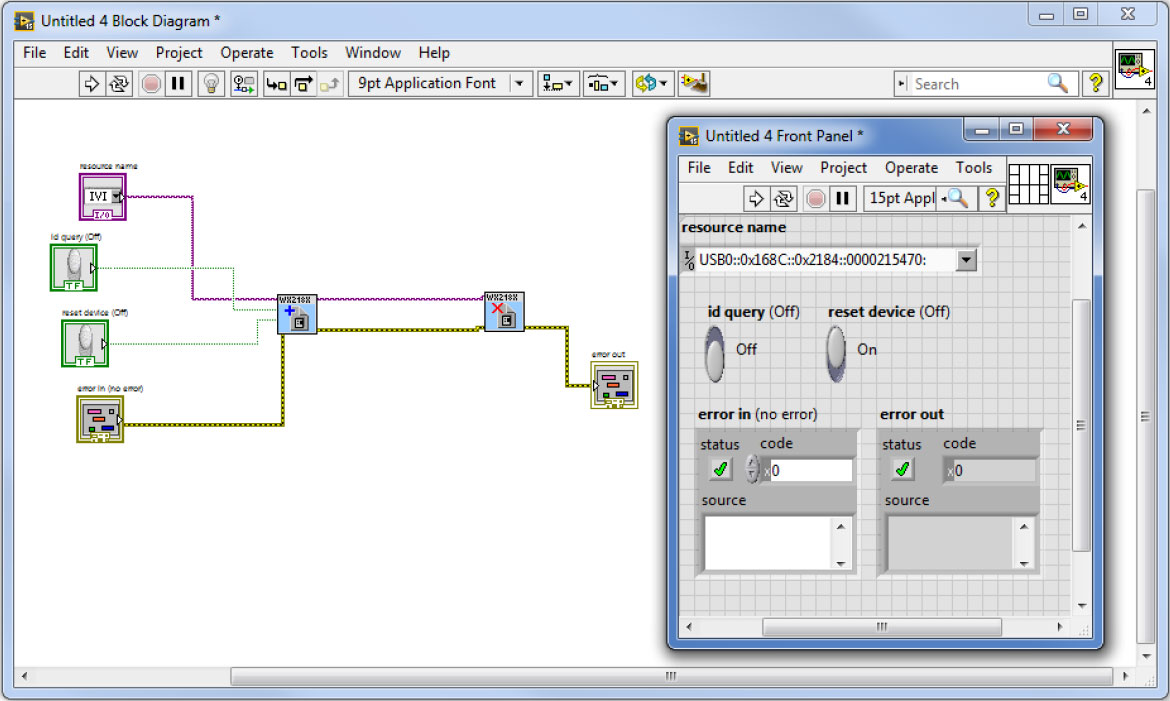
3. In the following example, the user will communicate with a WX unit using either USB, GPIB or
LAN remote interface as shown below. In order to do so, you will need to drag to the Block
Diagram of your application two sub VIs from the “wx218x VI Tree” Block Diagram:
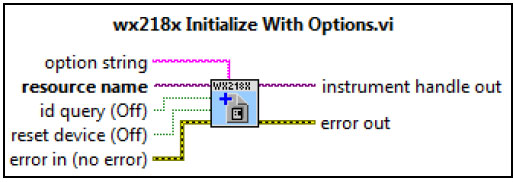
I. wx218x Initialize With Options.vi :
II. wx218x Close.vi:

4. Once you’ll run the example, a red REMOTE LOCKOUT sentence will pop up on the LCD display
of the WX unit when the I/O session will open.
Now that all the software and drivers required to work with the LabVIEW have been installed, please
proceed to the next tutorial “How to Control Tabor AWGs Using LabVIEW – Using SCPI commands”.
For More Information
To learn more about how to remote control Tabor instruments using LabVIEW, visit our website Support &
Tutorials zone. If you encounter difficulties with connecting to Tabor units using LabVIEW, please contact us at [email protected] and our support team will gladly help. For more of Tabor’s solutions or to
schedule a demo, please contact your local Tabor representative or email your request to [email protected]. More information can be found at our website at www.taborelec.com