In this tutorial, we will give a quick start guide on how you can communicate with the Tabor AWG with & without the use of NI-VISA to send Standard Commands for Programmable Instruments (SCPI). SCPI commands are an ASCII-based set of commands for reading and writing instrument settings.
For this tutorial, we will use win7 64bit OS, Python 2.7.12 (Anaconda2 4.2.0 64-bit) and a Tabor WX2184C using TCP/IP interface. To ensure you successfully established all the necessary settings for remote control over the Tabor instrument using LAN/USB/GPIB, please make sure you have already installed the latest NI-VISA (if you choose to use it) from the National Instruments website. Also please go over our connectivity tutorials on the Tabor’s website, to make sure you installed all necessary drivers.
- To connect and control the Tabor Instrument using SCPI Commands
1. Set the USB/LAN/GPIB as the remote interface, using the Tabor’s front panel buttons.
a. If you choose to communicate using LAN interface:
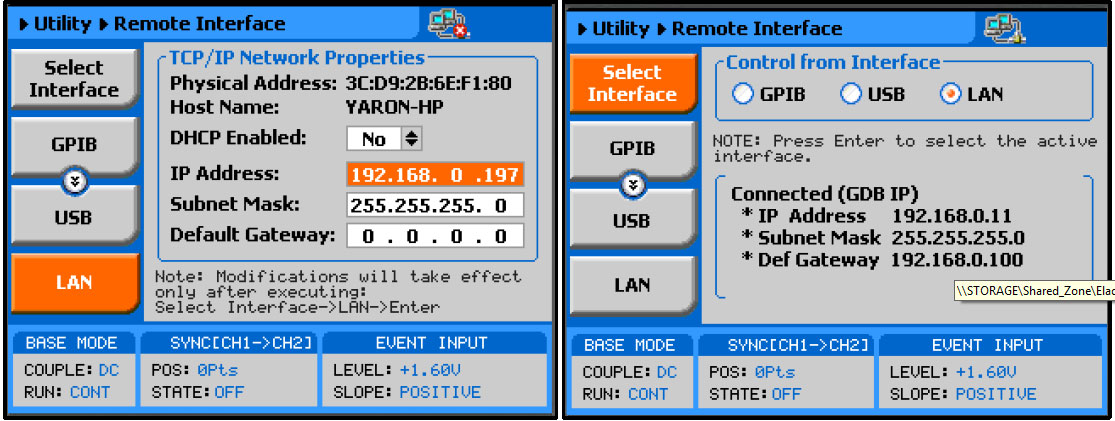
Go to “Utility”->”Remote Interface”->”LAN”. Modify the IP Address, Subnet Mask & Default Gateway as necessary to ensure TCP/IP connectivity between the Tabor device & the PC. For more information regarding TCP/IP connectivity, please refer to Here.
b. Go to “Utility”->”Remote Interface”->”Select Interface”->”Control from Interface”. Press Enter to select the active Interface you need. Wait for the answer “Done”. We chose to demonstrate using LAN.
2. Example using PyVISA (NI-VISA wrapper) for Tabor WX instruments:
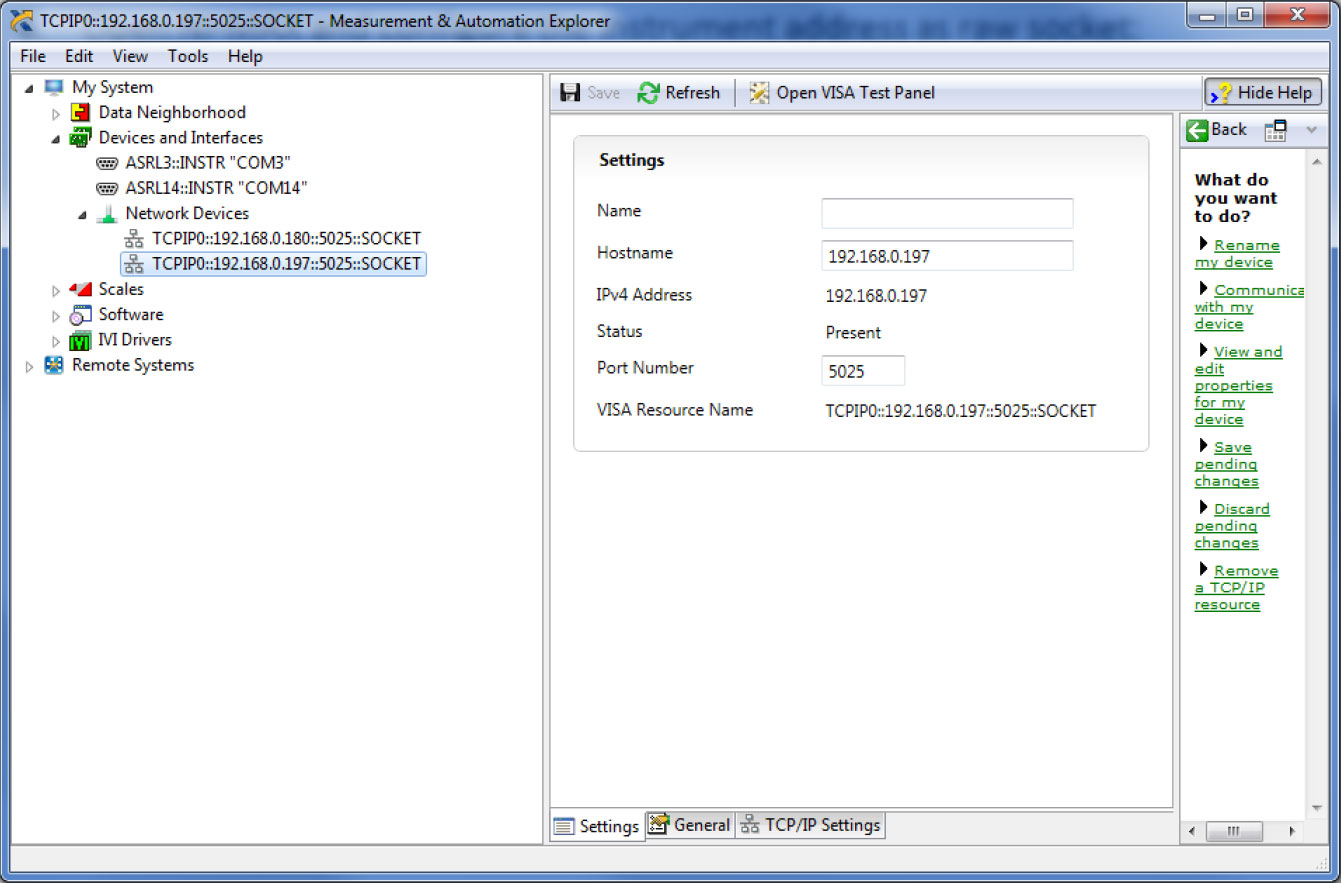
a. Open NI-MAX and configure the instrument address as raw socket:
b. Download the attached zip folder for this tutorial from the Tabor website tutorials section. Unzip & save them under the same directory on your PC’s hard drive.
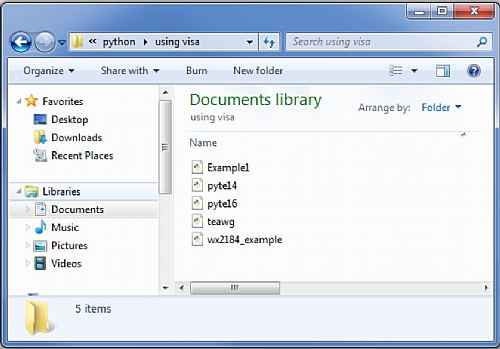
c. Make sure ‘teawg.py’ & ‘pyte16.py’ (‘pyte14.py’ for using PyVISA 1.4) are on the same folder as the example:
d. Open Spyder or any other Python IDE. Run Example1.py:
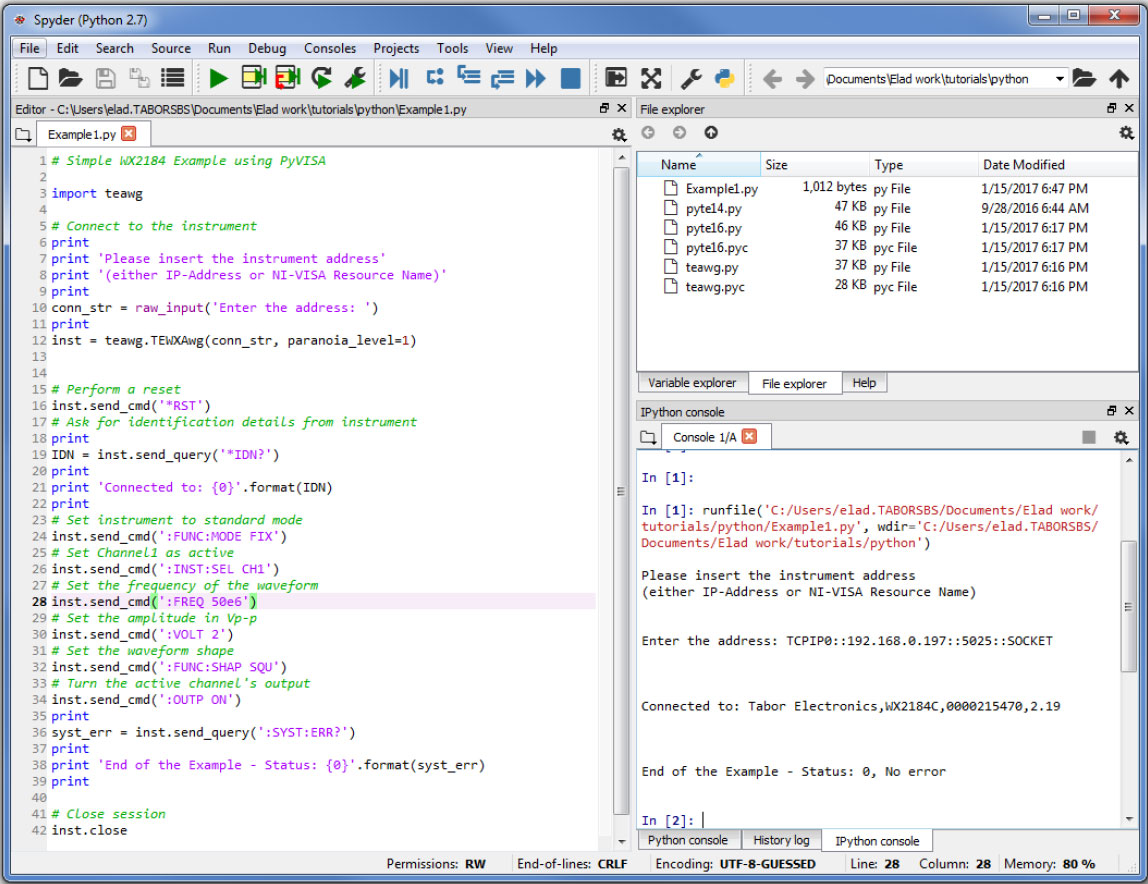
e. Following the examples above, as can be seen on a scope, a 50MHz 2Vp-p square waveform was created:

For a more advanced example using PyVISA with the WX2184C, please run ‘wx2184_example.py’.
3. Example without the use of PyVISA for Tabor WX instruments:
a. Download the attached zip folder for this tutorial from the Tabor website tutorials section. Unzip & save the files under the same directory on you PC’s hard drive (Make sure the ‘tewx.py’ is on the same folder as the example).
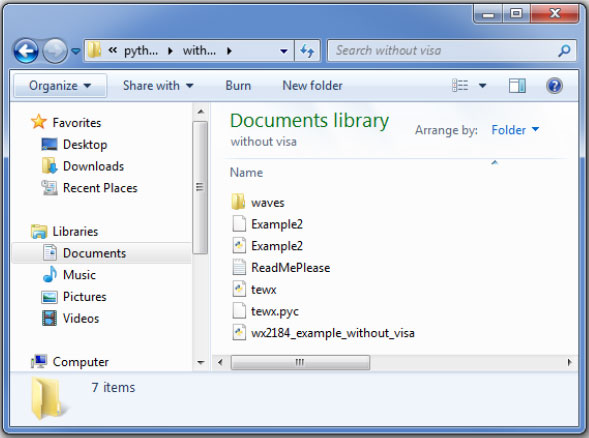
b. Please read the ‘ReadMePlease.txt’ file before proceeding, as establishing communication without NI-VISA using USB requires installation of Python-USBTMC.
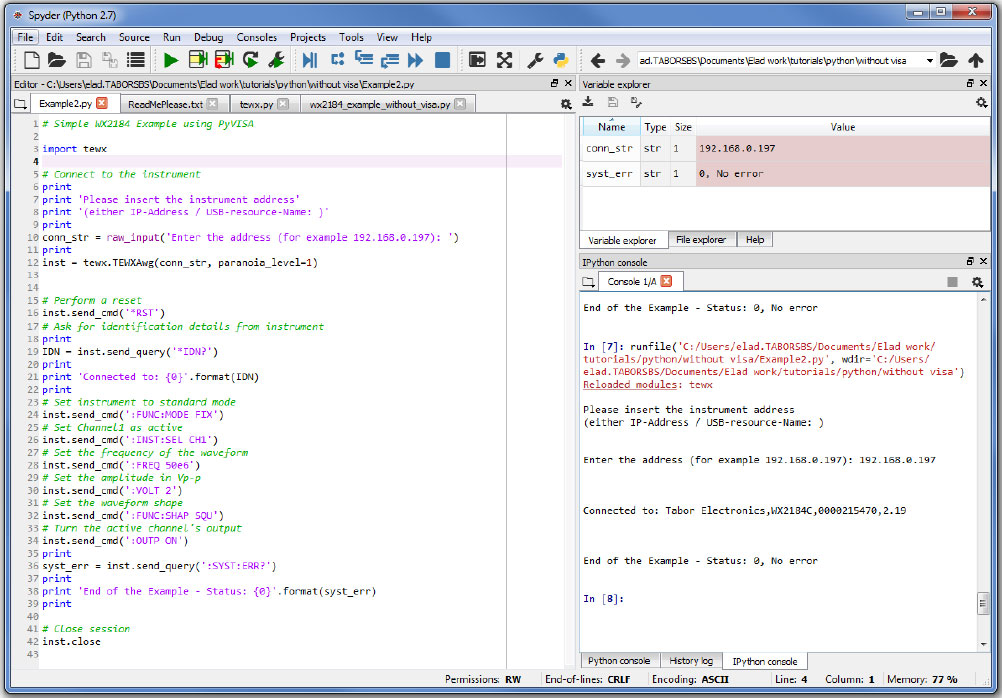
c. Open Spyder or any other Python IDE. Open and Run Example2.py:
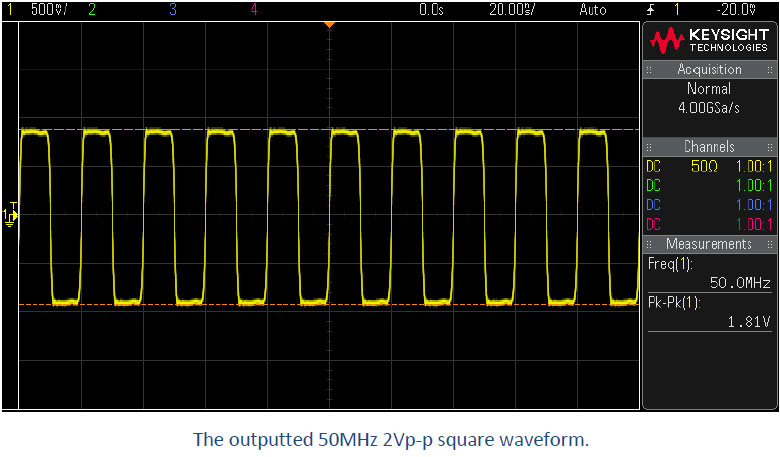
d. Following the examples above, as can be seen on a scope, a 50MHz 2Vp-p square waveform was created:
For a more advanced example of using the WX2184C, please run ‘wx2184_example_without_visa.py’.
4. Example without the use of PyVISA for Tabor WW instruments:
a. Download the attached zip folder for this tutorial from the Tabor website tutorials section. Unzip & save them under the same directory on you PC’s hard drive (Make sure the ‘teww.py’ is on the same folder as the example).

b. Open Spyder or any other Python IDE. Open and Run Example3.py:
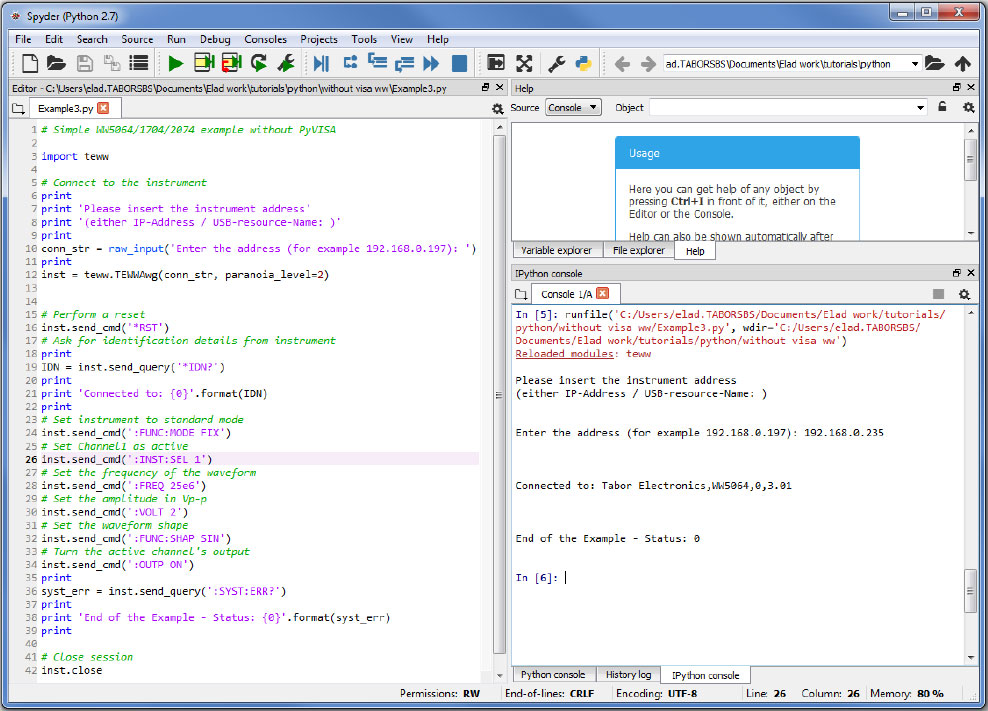
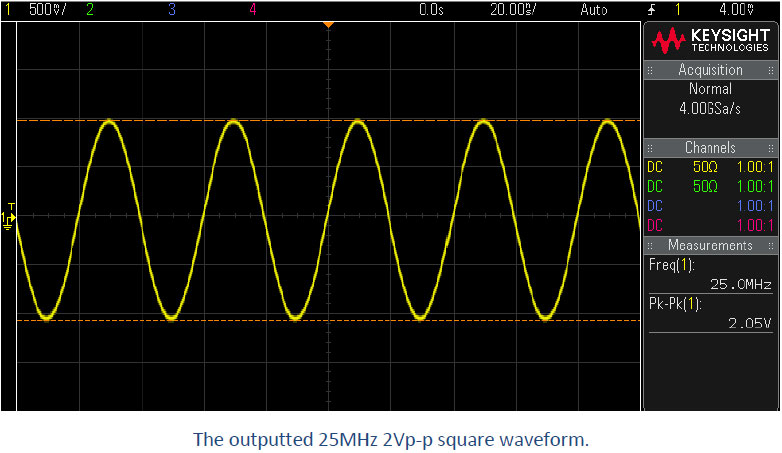
c. Following the examples above, as can be seen on a scope, a 25MHz 2Vp-p square waveform was created:
Inside the ‘teww.py’ file, you will find another example of how to download 3 segments, & define a simple 3 step sequence.
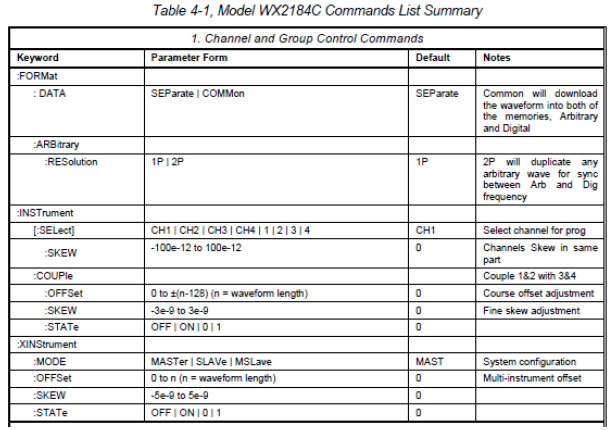
For a full list of the SCPI commands, you can use to control the AWG with, go to the Programming Reference chapter in the Tabor AWG’s User Manual.
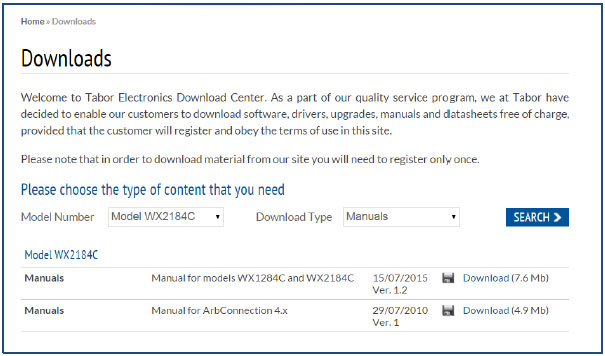
The User Manual can be downloaded from the Tabor website (you must be registered first):
In the next tutorials of the series “How to Control Tabor AWGs Using Python”, we will show how to communicate with the Tabor AWG using the IVI driver functions.
For More Information
To learn more about how to remote control Tabor instruments using Python, visit our website Support & Tutorials zone. If you encounter difficulties with connecting to Tabor units using Python, please contact us at [email protected] and our support team will gladly help. For more of Tabor’s solutions or to schedule a demo, please contact your local Tabor representative or email your request to [email protected]. More information can be found at our website at www.taborelec.com.